Building Your Own Beautiful Wooden Drawer: A Step-by-Step Guide
So, you're thinking about building a wooden drawer? Fantastic! It's a more rewarding project than you might think, and the end result – a beautiful, custom-made drawer perfectly tailored to your storage needs – is incredibly satisfying. This guide will walk you through the entire process, from choosing your wood to the final sanding. Don't worry if you're a beginner; we'll keep it simple and straightforward.

1. Planning and Preparation: The Foundation of a Great Drawer
Before you even touch a saw, a little planning goes a long way. This stage might seem tedious, but it'll save you headaches (and potentially wood!) down the line.

1.1 Measuring and Designing Your Drawer
First things first: measure the space where your drawer will live. Are you building it to fit an existing cabinet? A dresser? A custom-built unit? Knowing the exact dimensions is crucial. Add a little extra space – maybe 1/16th of an inch – to account for wood expansion and contraction. You don't want a tight fit! Sketch out your design, noting the dimensions of the drawer front, sides, back, and bottom. Consider the depth you need for your intended storage.
1.2 Choosing Your Wood: The Heart of the Matter
This is where you get to have some fun! The type of wood you choose drastically impacts the look and feel of your finished drawer. Some popular choices include:
- Pine: Affordable, soft, easy to work with, but can be prone to dents.
- Oak: Strong, durable, beautiful grain, but can be more challenging to work with.
- Maple: Hard, smooth, light-colored, excellent for painting or staining.
- Cherry: Rich reddish-brown hue, beautiful grain, but more expensive.
Consider your budget, the aesthetic you're aiming for, and your woodworking skill level when making your selection. Remember to buy enough wood to account for mistakes – it's always better to have a little extra than to run short!
1.3 Gathering Your Tools: Essential Equipment
You'll need a few basic tools to get started. Don't worry, you probably already have some of them! Here's a list:
- Measuring tape and pencil
- Hand saw or circular saw (a circular saw will make things much faster)
- Wood chisels (for cleaning up any rough edges)
- Sandpaper (various grits)
- Wood glue
- Clamps (to hold pieces together while the glue dries)
- Screwdriver or drill (if you're using screws)
- Safety glasses and dust mask (crucial for your safety!)
Optional but highly recommended: a miter saw for cleaner cuts, a planer for smoothing surfaces, and a router for creating decorative edges.
2. Cutting and Assembling the Drawer: Bringing It to Life
Now for the fun part – actually building the drawer! Take your time, be precise with your measurements, and remember safety first.
2.1 Cutting the Wood to Size
Using your measurements from the planning stage, carefully cut the wood for the drawer front, sides, back, and bottom. Make sure your cuts are square and clean. If using a hand saw, use a guide to help keep your cuts straight. If using a power saw, always wear safety glasses and follow the manufacturer's instructions.
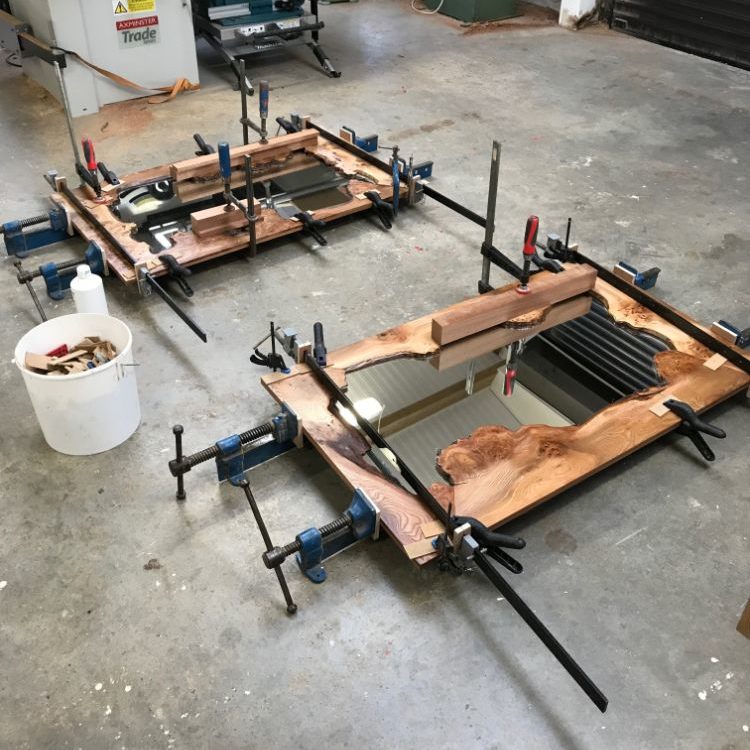
2.2 Assembling the Drawer Sides and Back
Apply wood glue to the edges of the drawer sides and back. Carefully align them and clamp them firmly together, ensuring that they form a square or rectangular shape. Let the glue dry completely according to the manufacturer's instructions – usually about an hour.
2.3 Adding the Drawer Bottom
Once the glue is dry, fit the drawer bottom into the assembled frame. You can either use wood glue and clamps or, for a stronger joint, use small brads or screws. Ensure the bottom is flush with the sides and back. Again, let the glue dry completely.
2.4 Attaching the Drawer Front
The drawer front is usually attached last. You have a few options here: You can use rabbet joints (a groove cut into the sides to receive the front), dadoes (similar to rabbets but wider), or simply attach the front with screws from the inside. Choose the method that best suits your skill level and tools.
3. Finishing Touches: Polishing Your Creation
Almost there! Now it's time to give your drawer that professional, polished look.
3.1 Sanding for Smoothness
Carefully sand all surfaces of your drawer using progressively finer grits of sandpaper. Start with a coarser grit (like 80-grit) to remove any imperfections and gradually move to finer grits (like 120, 180, and 220-grit) to achieve a smooth, even finish. Sand with the grain of the wood to avoid scratches.
3.2 Applying Finish: Protecting and Enhancing Your Drawer
Applying a finish protects your drawer from moisture and wear and tear, and it also enhances its beauty. You have several options:
- Paint: A great option for covering imperfections or creating a bold color.
- Stain: Enhances the natural wood grain and color.
- Polyurethane: A clear finish that protects the wood and provides a durable surface.
- Shellac or varnish: Provide a beautiful, smooth, durable finish.
Follow the manufacturer's instructions carefully when applying your chosen finish. Multiple thin coats are generally better than one thick coat.
3.3 Installing Drawer Slides (if necessary)
If your drawer is going into a cabinet or dresser, you'll need to install drawer slides. There are many different types available, so choose ones that are appropriate for your drawer's weight and size. Follow the manufacturer's instructions carefully for installation.
Commonly Asked Questions
Q: What kind of wood glue should I use?
A: Use a high-quality wood glue specifically designed for woodworking. Titebond is a popular and reliable brand.
Q: How long should I let the glue dry?
A: Always refer to the instructions on your glue bottle. Generally, you should let it dry for at least an hour, but it's better to err on the side of caution and let it dry longer.
Q: What if my cuts aren't perfectly square?
A: Don't worry! Slight imperfections can often be sanded down or hidden with the finish. For major discrepancies, use wood filler to fill gaps before sanding.
Q: Can I use screws instead of glue?
A: You can, but glue is generally preferred for a stronger, more durable joint. Screws can sometimes weaken the wood.
Q: What if I don't have all the tools listed?
A: You might be able to borrow some tools from a friend or rent them from a hardware store. Alternatively, some steps might require more manual effort without the power tools.
Building a wooden drawer might seem daunting at first, but with careful planning, attention to detail, and a little patience, you can create a beautiful and functional addition to your home. So get started, and enjoy the process!